
GitHub in a Nutshell
What is GitHub?
GitHub is a popular online repository for developers to store and share their projects. Think of it as an online library where people create their own books and share them with each visitor to the library. Since it is open-sourced, each person can contribute by writing books in the library, give suggestions like grammar errors or spelling errors, and even request new chapters to a book. The book’s original author can then see these suggestions and decide whether or not to implement it into their book.
This simplified process is how GitHub works, but instead of books, the users create “projects,” and other users can give out suggestions to improve the project and request for features to be added. With GitHub, you can collaborate with other users or invite them to work on your project anywhere. Suppose you have private projects that you would only like to share with users between your organizations. In that case, it is possible to create a private repository under your specific organization. In fact, this is done in companies both private (i.e., Google, Microsoft, Twitter) and public (i.e., various government agencies).
GitHub users also span well beyond computer science or information technology background; many of those who use GitHub also comes from a science background (i.e., biology, bioinformatics, mathematics) to even financial backgrounds. So you can use this as a means to not only contribute to projects but also to network and learn with and from other GitHub users.
Why use GitHub anyway?
 The Git and The Hub taken from fofx Academy
Have you ever worked with your peers with Google Docs? If you haven’t, that’s okay, but for those who have, you’ll notice that Google Docs have a “Version History” feature where the users can see what has been changed, who changed it, and when. Like Google Docs, GitHub has a tight version history (or better known as “Version Control”) system. Unlike Google Docs, only the original author can approve the new changes before it can be implemented. We call this version control system “Git,” the core system that GitHub is built on top of.
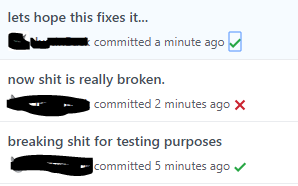 Version Control in a Nutshell from r/ProgrammerHumor
Version control is just one of the many features Git and GitHub offers. As you dive more into it, you’ll see that GitHub and its ecosystem are versatile; so many people even use it continuously. For now, let’s focus on the main idea - the Git (version control) and the Hub (Web hosting for Git repositories)
Getting to know GitHub
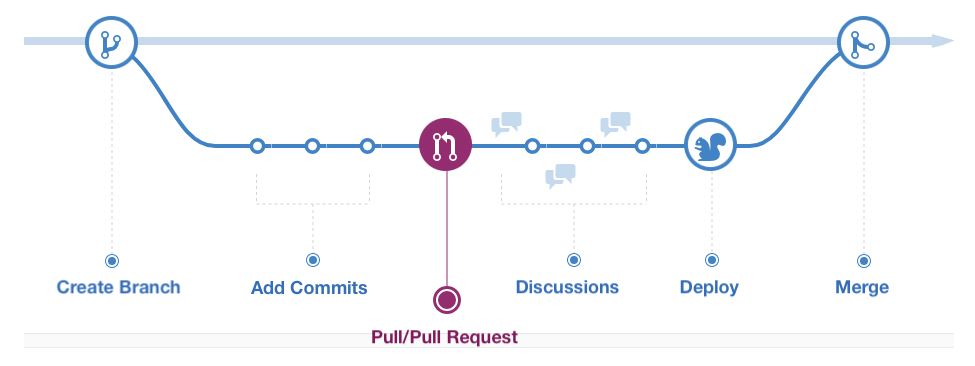 GitHub Workflow from GitHub Guides
Before we dive deep into how GitHub and Git works, there are a few common terms you need to familiarize yourself with.
Repo/Repository
A repo/repository is where you will store the necessary file for your specific project. You can create many repositories to store different projects in your GitHub account. You can make it private or public to have multiple collaborators.
Fork/Forking
Imagine finding a repository from another GitHub user that you’d like to contribute or play around with. You can then “fork” that repository that you want into your own GitHub account. This act is similar to just creating a copy of that specific repository and pasting it into your personal GitHub account. You can then play around with that repository without affecting the original repository.
Branch
When you create a repository, GitHub will make that the “main” or default branch. If, for example, you want to change one of the project files of that repository, but you’re worried that it will ruin the project, you can create a parallel copy - or in this case, a branch - of your repository that diverges from the “main” branch inside the same repository. Any changes that are done in the branch outside of the “main” branch will not affect the “main” branch, so you can freely work on your project without having to worry that it could potentially disrupt the “main” branch.
Clone/Cloning
Unlike a branch where you copy your repository inside your own repository, a clone is a copy of your repository that you download on your local computer instead of GitHub’s website server. Cloning is the act of downloading the repository into your local computer. This allows you to make changes to your project without having to be connected to the internet. When you want to connect to your online GitHub repository, you can push the file changes in your local computer into GitHub with Git’s help of Git.
Commits
When you make changes into your repository, whether it’s adding a few lines of README file, uploading a file or deleting a file, etc., you’re making what is called a “commit.” Anytime you commit, you also create a history of changes in the files for you and other users to see. This helps keep track of your progress, and it lets you revert your changes if you found a bug or… maybe you just had a change of heart.
Push
This is mentioned briefly in the previous section. To push means that you send the changes to your project files into the designated repository hosted on GitHub.
Pull/Pull Request
When you “pull,” you are essentially fetching the changes done to a project file in a repository and then merging them. For example, when someone made new changes into the repository in GitHub, and you’d like your local version of the repository to be updated, you can “pull” the changes and merge them into your local copy, so that it’s up to date.
A pull request is made when you’re finished with your local modified copy of that repository, and you would like to merge your version into the main branch. By creating a pull request, you’ll notify all the developers or teams working on that repository about your new modified copy so that they can review the code before deciding whether or not to merge your branch copy into the main branch.
Fetch
Both fetch and pull commands do the same thing - getting the latest changes from the remote repository. The differences lie in whether or not you’ll merge the update to your local copy of the repository. With the pull command, you retrieve the latest changes from the original repository. You copy those changes into your local repository.
However, with fetch, what you’re doing is just retrieving the latest meta-data info from the original repository without copying or transferring the changes on the files into your local repository.
Getting Started
 Getting your hands dirty
Okay, so you’re itching to get started. How do you get started though? The easiest first step would be to sign up for GitHub and get yourself an account on your own. The rest, well, let’s break it down shall we?
Steps breakdown
1. Sign up for GitHub
Seriously, just go to their website at GitHub and make an account. Use whatever name you want as long as its proper. You don’t want people to call you something like fartmaster69 or something like that (I know some of you are tempted to do so based on years hanging around with you guys). Remember, the reason you’re making GitHub is to learn, create portfolios and connect with other users in a professional manner. Unless you want to use it for your personal “he he” account. That’s up to you to decide.
2. Start with creating your first repository
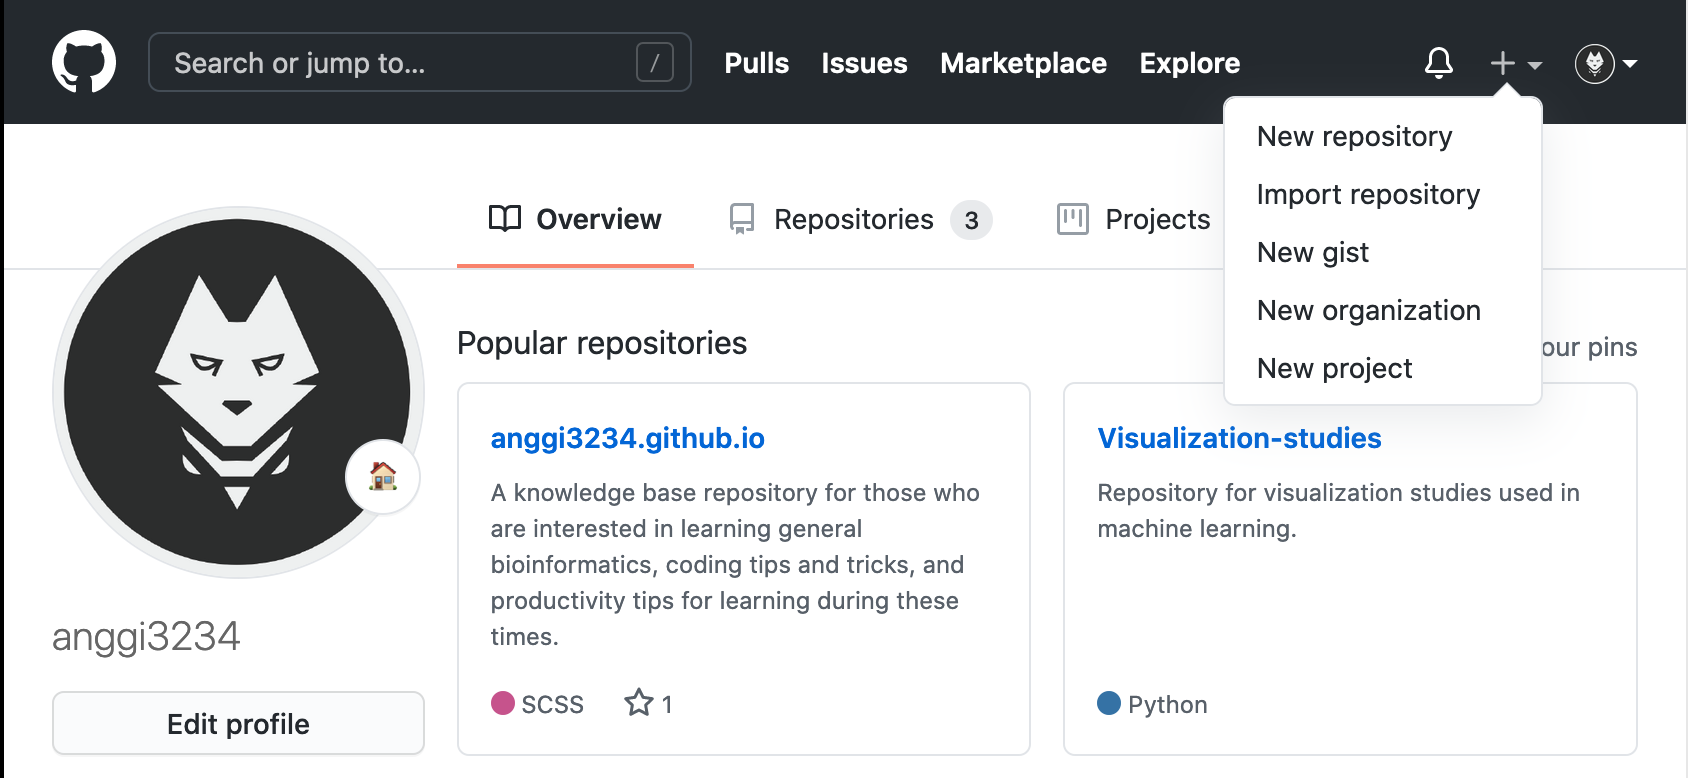 Making your first repository
Go to your GitHub account page and click on the plus (“+”) button to create your new repository. You’ll then be redirected into the repository creation page. On this page, you’ll be able to:
- Give a unique and descriptive name for your repository.
- Create a description to let others know what your repository is all about.
- Determine whether you want your repository to be Public or Private.
- Add some essential files such as a README file.
3. Install and set up Git to your local computer
So you’ve set up your repository at GitHub! Congratulate yourself; you did it! 🥳
Now we need to figure out how to connect your remote repository with Git, the backbone of GitHub.
Windows
First, go download and install Git for Windows from their website. If you installed it correctly, you should be able to use Git from the Windows command prompt.
macOS
The easiest way to install Git for mac is by using Homebrew. I suggest you to install Homebrew, since you’ll find many development codes or projects requires Homebrew to install as well. Once done, installing Git is as easy as going to your Mac terminal and typing:
1
> brew install git
Or if you’re feel like you’re up for some challenge, you can try the other installation method for Git for macOS
Linux
You can just simply use the Linux package management system.
For Debian/Ubuntu:
1
> apt-get install git
As always, you can refer to the Git installation page for Linux for other Linux distributions.
Configuring your Git
Create an empty directory and navigate there. This empty directory is going to house the remote project repository that you’re going to work with. Run the Git commands to configure Git with:
1
2
> git config --global user.name "<your user name>"
> git config --global user.email "<your user email>""
Congratulations, you have Git ready in your system! Now its time for us to initialize Git repository in your empty directory. To do so, you use the:
1
> git init
This way, you have activated Git in your directory, and now you can work on your repository for your project here. The next step would be to learn the commands used in Git and GitHub.
Since Git is mostly a command line interface, if you’re uncomfortable using it and would like to use a GUI version of Git, you can use GitHub desktop. Don’t want to use GitHub desktop? You can browse more GUI Clients for Git here
4. Clone the remote repository
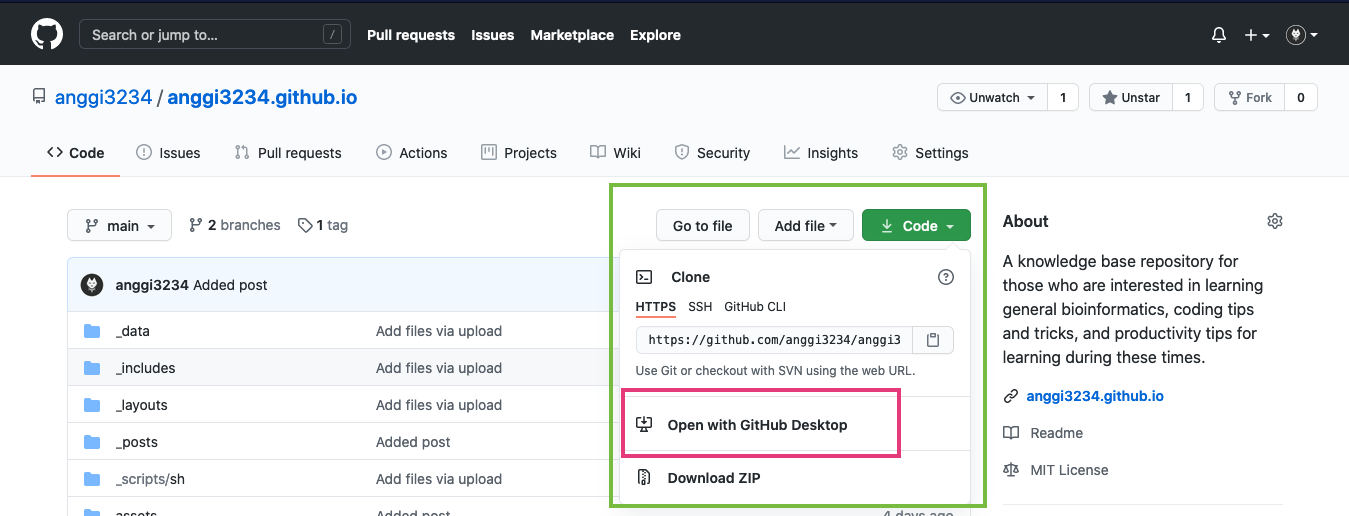 Cloning your repository
You have the empty folder and have initialized Git in your system. Now let’s populate the empty folder by cloning the remote repository. You can clone the repository by using Git with the command:
1
> git clone (URL of the repository)
As an example, your URL repository should look somewhat like:
1
2
# change it to your own username and github repo
> git clone https://github.com/YOUR_USERNAME/YOUR_REPO.git
If you want to clone it using GitHub desktop, just run GitHub Desktop and choose the “Open with GitHub Desktop” option. When prompted, select the empty folder you have prepared in the previous step.
5. Make changes and committing to the project repository
You can now edit, delete, or add some files into the repository directory on your computer however your like. You can edit the README.md file or add another text file to get started. If you want to add a new file using Git, you can use:
1
> git add <filename>
Whenever you make changes, it’s important to give it a note to let others know what is changed to keep others updated and help them understand your code. To do this, you need to “commit” the changes with a message like:
1
> git commit -m "Commit message"
The file you just created or edited should now be committed, but not yet in your remote repository.
 Making changes and committing changes
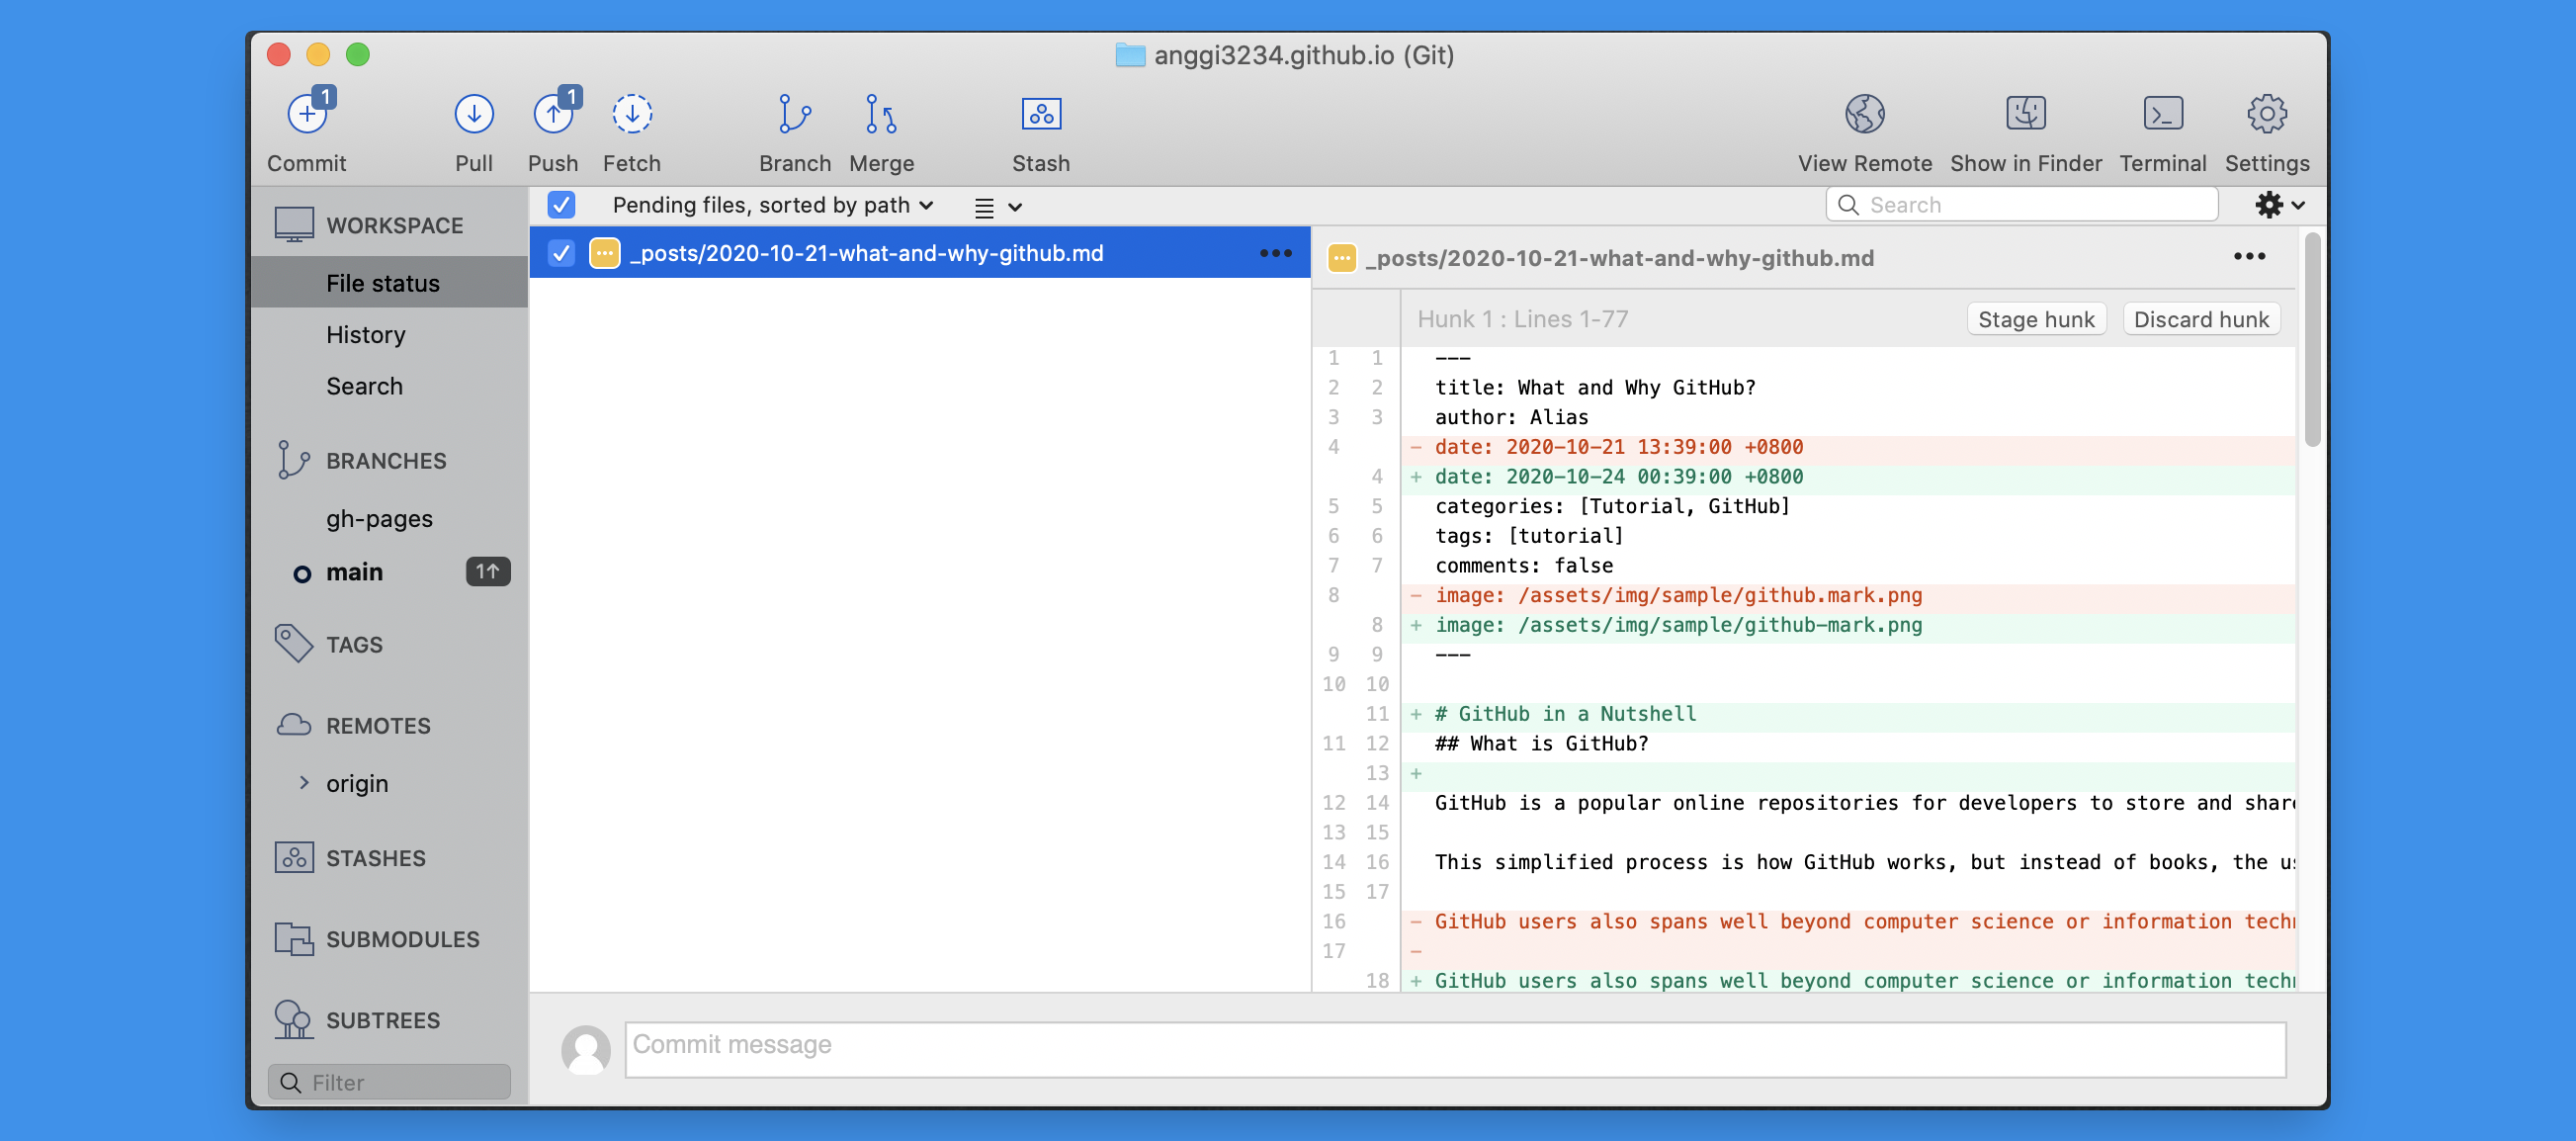
For those of you who use GitHub Desktop, you should see the changes summary box on the lower left side of the window along with the “Commit to main” button. You can also see the changes made to your local repository and the files that have been changed.
In the picture, you can also see which branch you are currently working on and how many files are waiting to be pushed into the remote repository on the top of the window.
6. Push changes to the remote repository in GitHub
You have the changes ready in your local repository. Now, all we need to do is push them to our remote repository at GitHub. With Git, it’s as simple as:
1
> git push
And for GitHub Desktop users, you can simply do this by clicking on the “push” button like so:
 Pushing changes to remote repository
Resources and Final Thoughts
Okay, so you kind of know the basics of how GitHub works, so its time to give it a try! Go ahead and fork this project or clone it and play around with it. If you want to learn more, you can refer to the lists here:
| Link | What you can learn |
|---|---|
| GitHub Docs | You can learn more terms from the GitHub Official docs here |
| Git Cheat sheet | A compilation of cheat sheet for Git and more! |
| Git-it | Here you can find resources and step by step challenges for Git |
In the meantime, go ahead and play around with GitHub and Git! You’ll learn more terminologies and the inner mechanics of both worlds faster by doing and practicing. Explore GitHub. You’ll find lots of helpful and “interesting” (ahem) repositories that you can tinker with.